# Quick Start
[AnimatedBookMenu_ExampleProjects.zip](https://docs.suricoon.com/attachments/2)
## Prerequisites
- Make sure the correct version of Unreal Engine is installed (UE 5.3+)
- Make sure you have purchased the Plugin from the Marketplace and installed it to the Engine
## Create a new Project
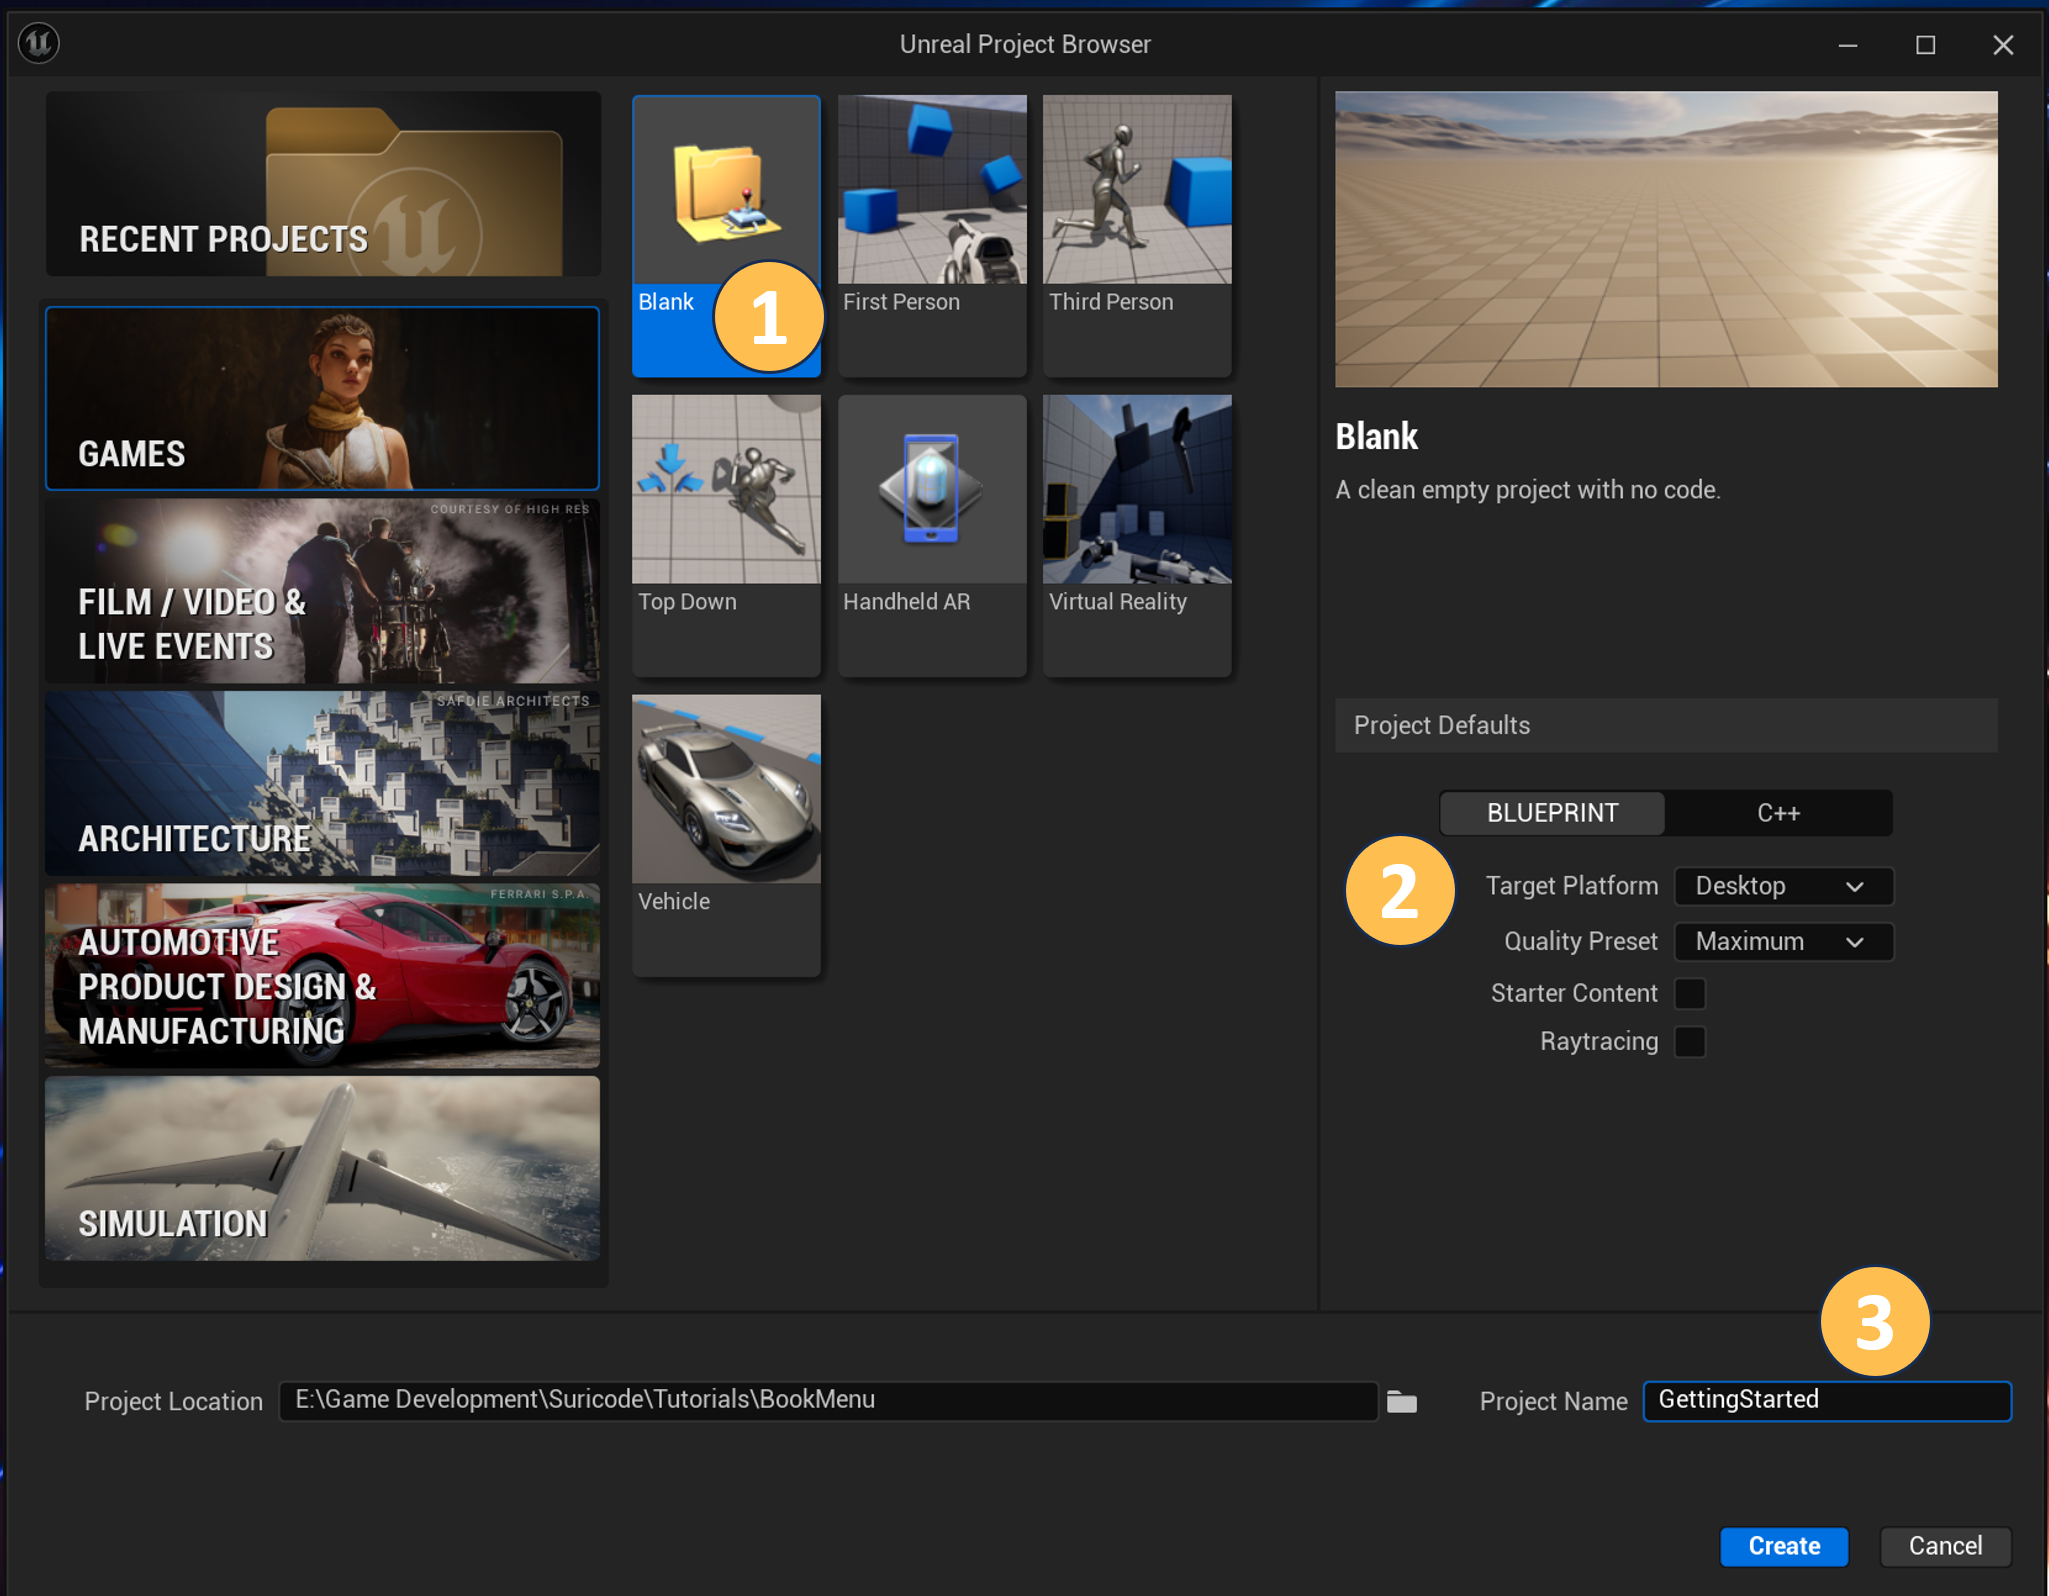
__Open Unreal Engine Launcher and launch Unreal Engine (5.3+)__
__Create a new Project__
1. Select Blank Project
1. Select Blueprint with Target Platform Windows, Quality Preset Maximum and leave Starter Content and Raytracing unchecked
1. Name the Project GettingStarted
1. Click on Create
__Project Settings__
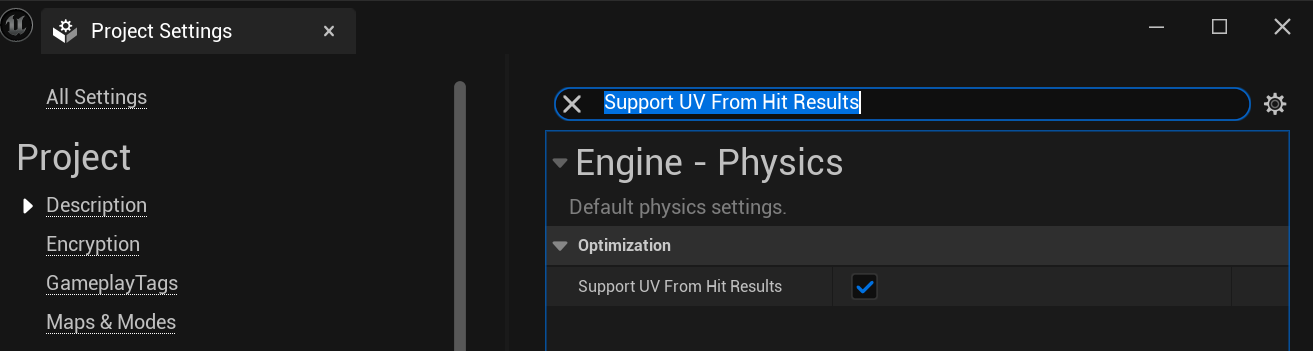
- Once the project has loaded, go to ``Settings > Project Settings``
- In the Search bar type: Support UV From Hit Results
- Enable the setting ``Optimization > Support UV From Hit Result``
> **_NOTE:_** If being asked to restart, ignore it, we will restart the editor after the next step
__Enable Plugin__
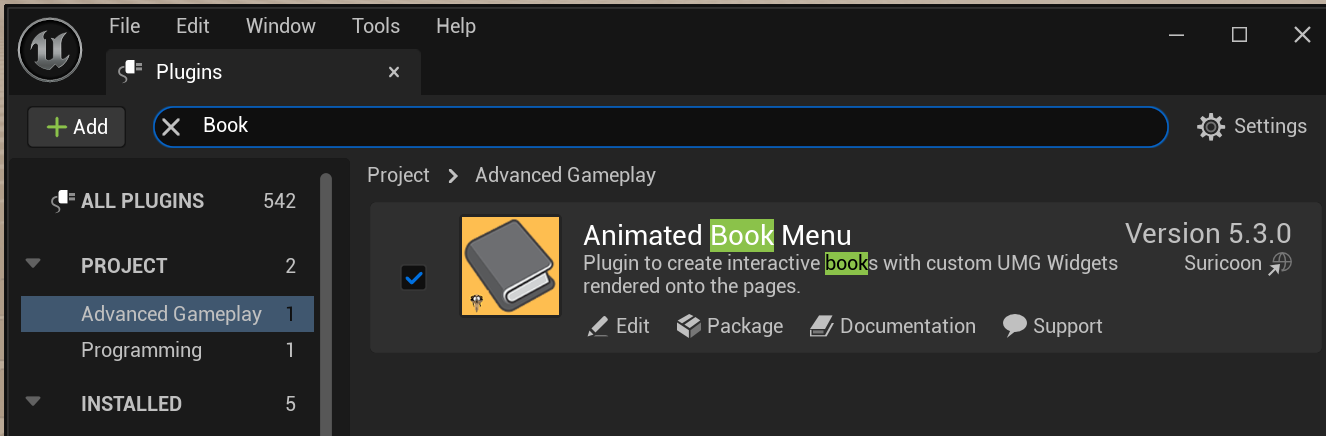
- Navigate to ``Edit > Plugins``
- In the category "Advanced Gameplay" enable the Animated Book Menu Plugin
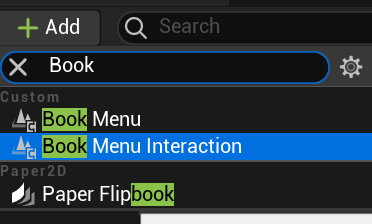
- You can also search for "Book" in the search bar and then enable it
> **_NOTE:_** If being asked to restart the editor, confirm with Restart Now
## Prepare some Content
__Folder Setup__
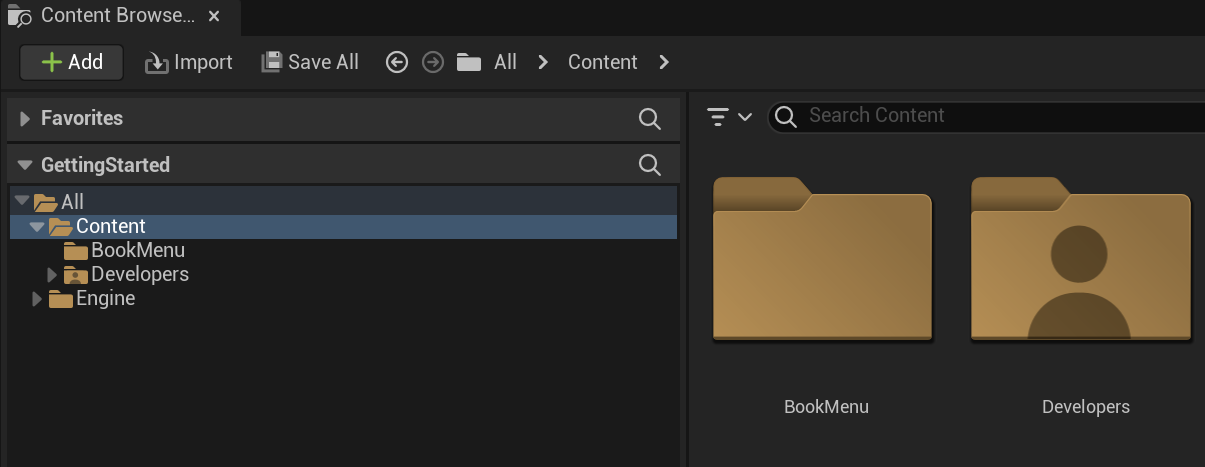
- In the Content Browser under Content, create a new Folder with the name "BookMenu" and navigate to it.
__Copy some initial files from the Plugins Content Folder__
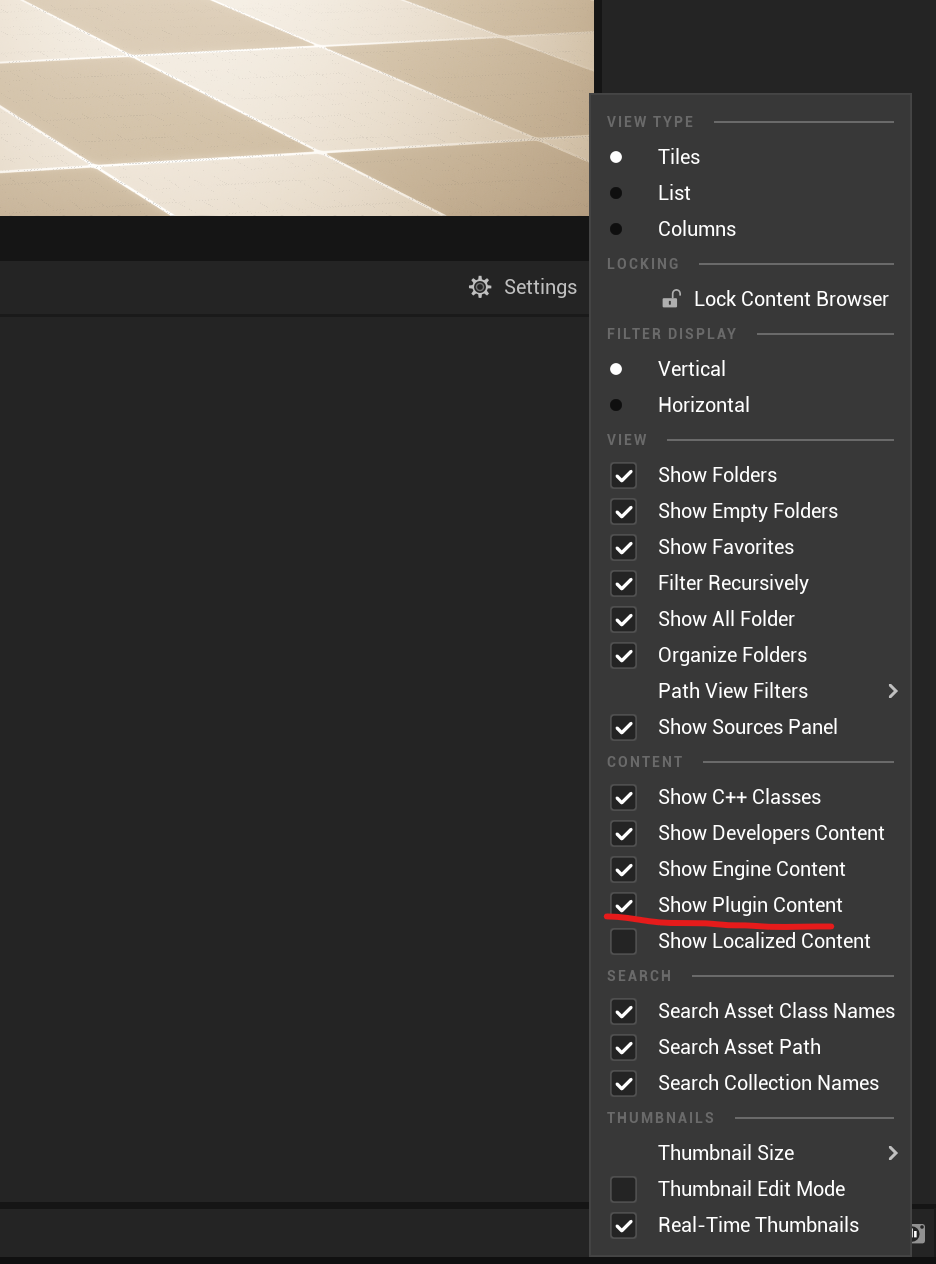
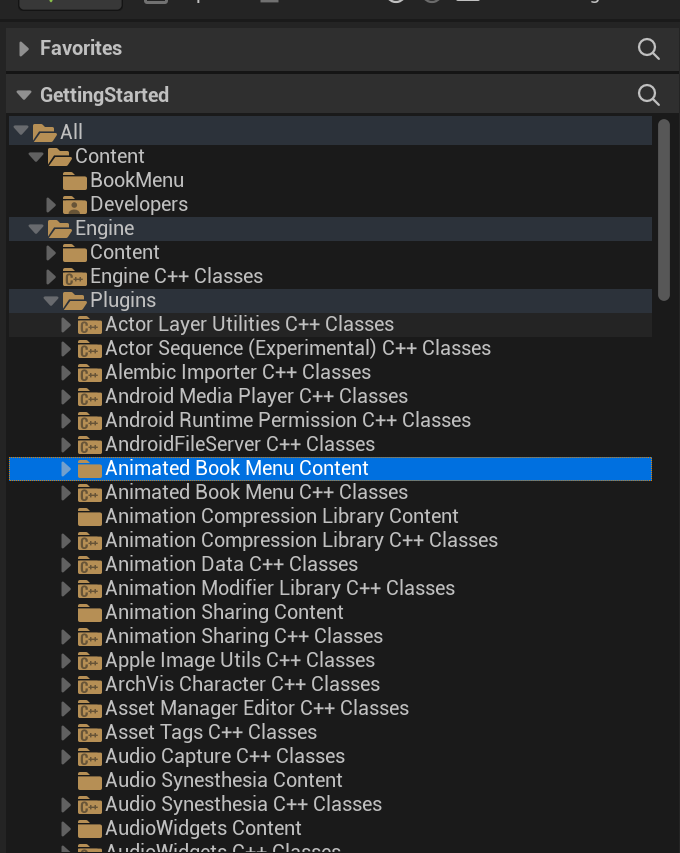
- In the Content Browser under Settings, make sure the Show Plugin Content option is checked
- Then navigate to the Content Folder of the Plugin, with the name Animated Book Menu Content
- Copy the following files from the Plugin Content folder to the BookMenu folder:
| From | To |
| ------------------------------------------| ----------------------------------|
| /BookMenu/Blueprints/BookMenuActor_BP | /Game/BookMenu/MyBookMenuActor_BP |
| /BookMenu/BookData/Example_Book_Menu_Data | /Game/BookMenu/MyBookData |
## Basic Player Pawn Setup
__Create Player Pawn Blueprnt Class__
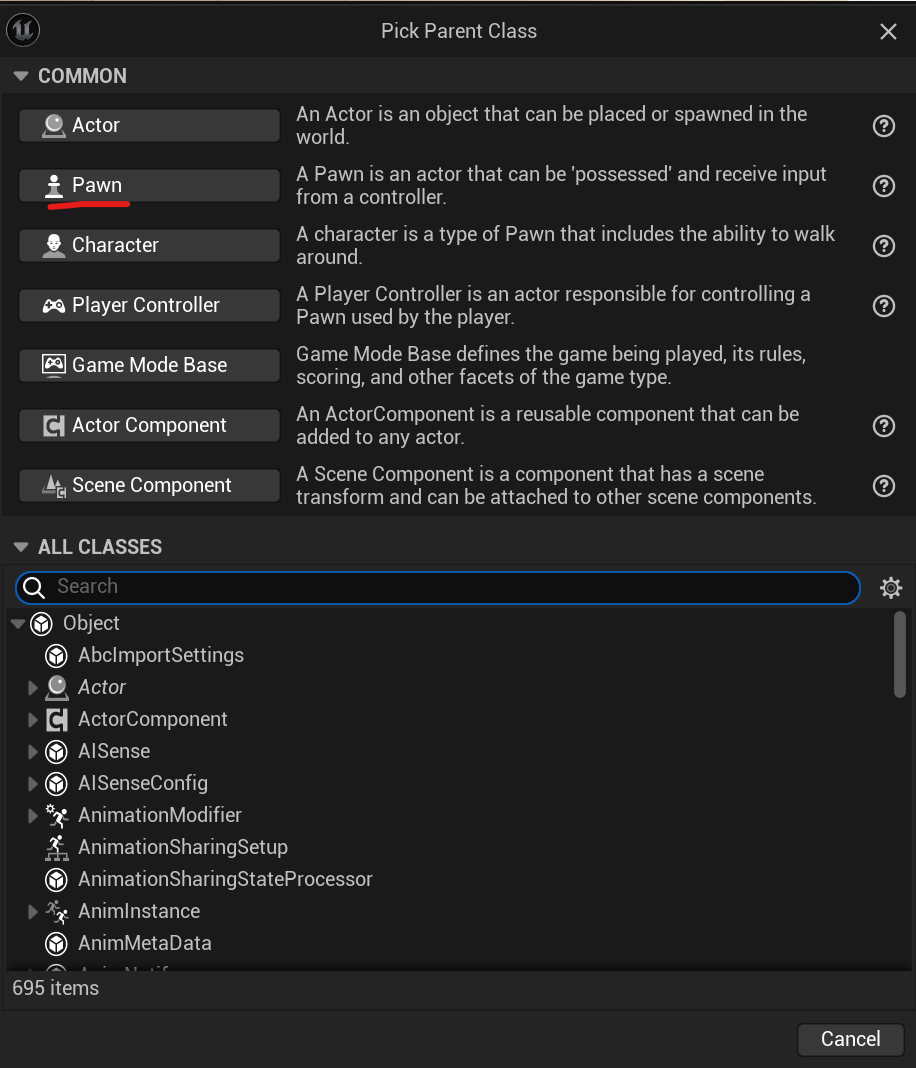
- Create a new Blueprint Class and select Pawn and name it PlayerPawn_BP
__Add the Book Menu Component to the Player Pawn__
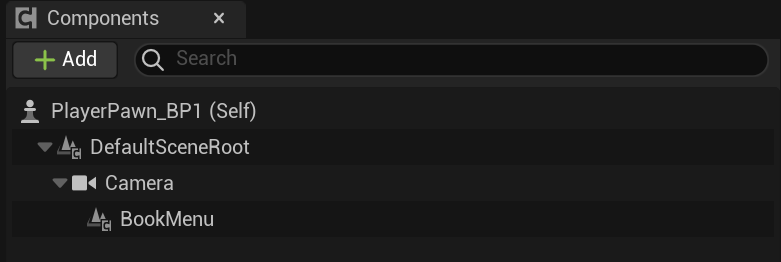
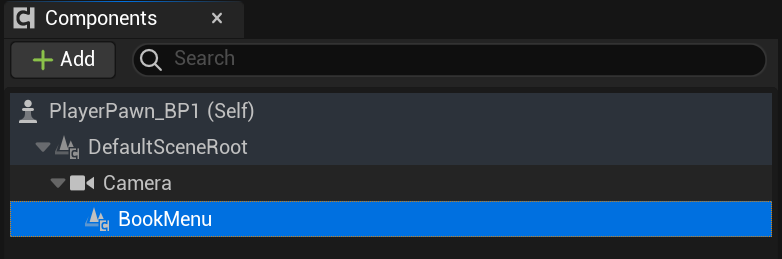
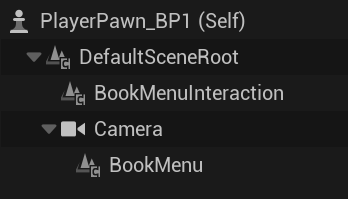
- Open the PlayerPawn_BP Blueprint and under Components, add the following Components to the DefaultSceneRoot
- Camera
- BookMenu
__Configure the Book Menu Component__
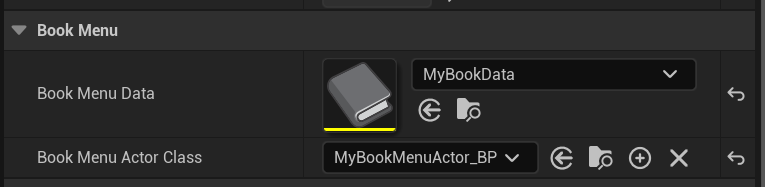
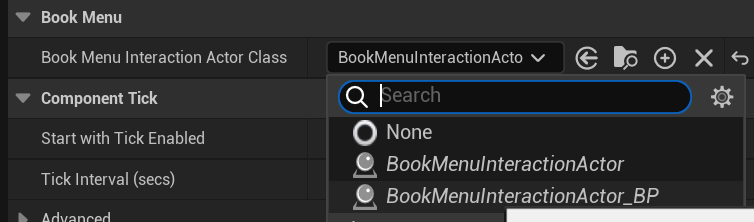
- Select the BookMenu Component from the Component List
- and under Details->BookMenu set the following settings:
- While the two options are the copied assets from the previous Step.
__Add some Begin Play Logic__
- Add the following Blueprint nodes to the Begin Play event
- This sets the Input node to Game and UI and shows the mouse cursor.
## Map Setup
__Save the Map and set it as the Editor default map__
Because we used the Blank Project Template, the editor will give us the default map at startup, which we have to save first.
Click on ``File > Save All``\
When being asked where to save the map, choose ``/BookMenu/Map.umap``\
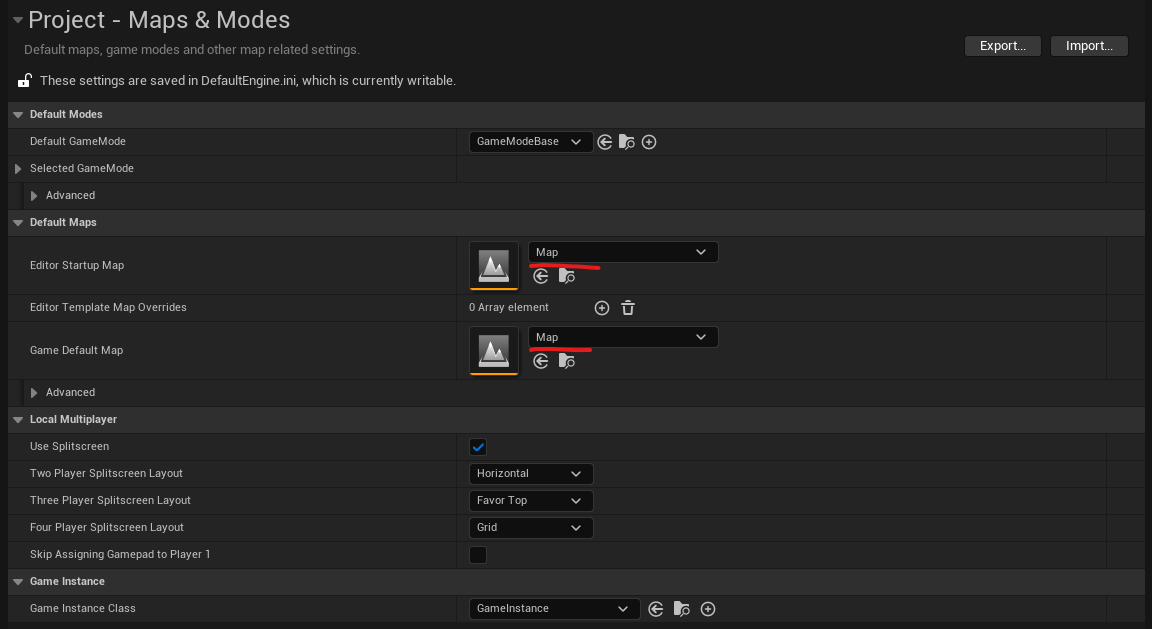
Then goto ``Settings > Projects Settings > Maps & Modes``
Set Editor Startup Map and Game Default Map to the Map we have saved previously.
__Place Player Pawn on Map__
Drag and Dop the PlayerPawn_BP Blueprint onto the map and adjust its position to something like that:
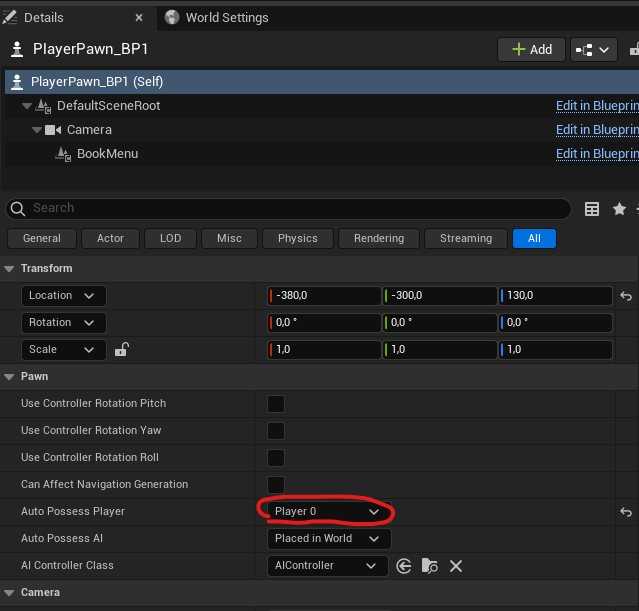
Select the recently placed ``PlayerPawn_BP`` Actor and navigate to the Details Panel.\
Under ``Auto Poses Player``, select ``Player 0``\
It is important to also delete the Player Start Object from the Map
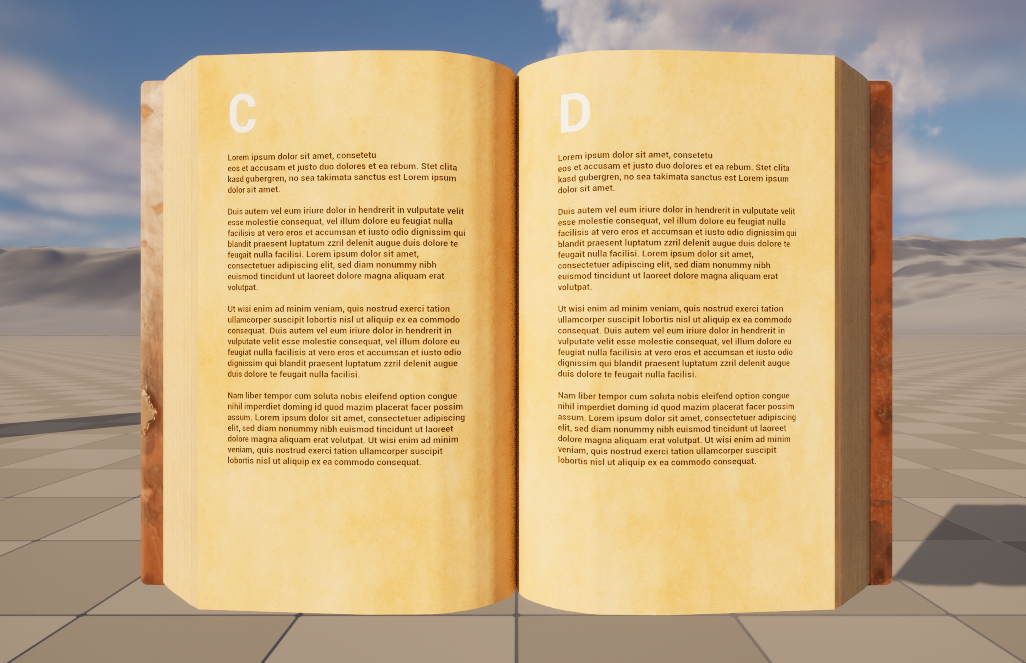
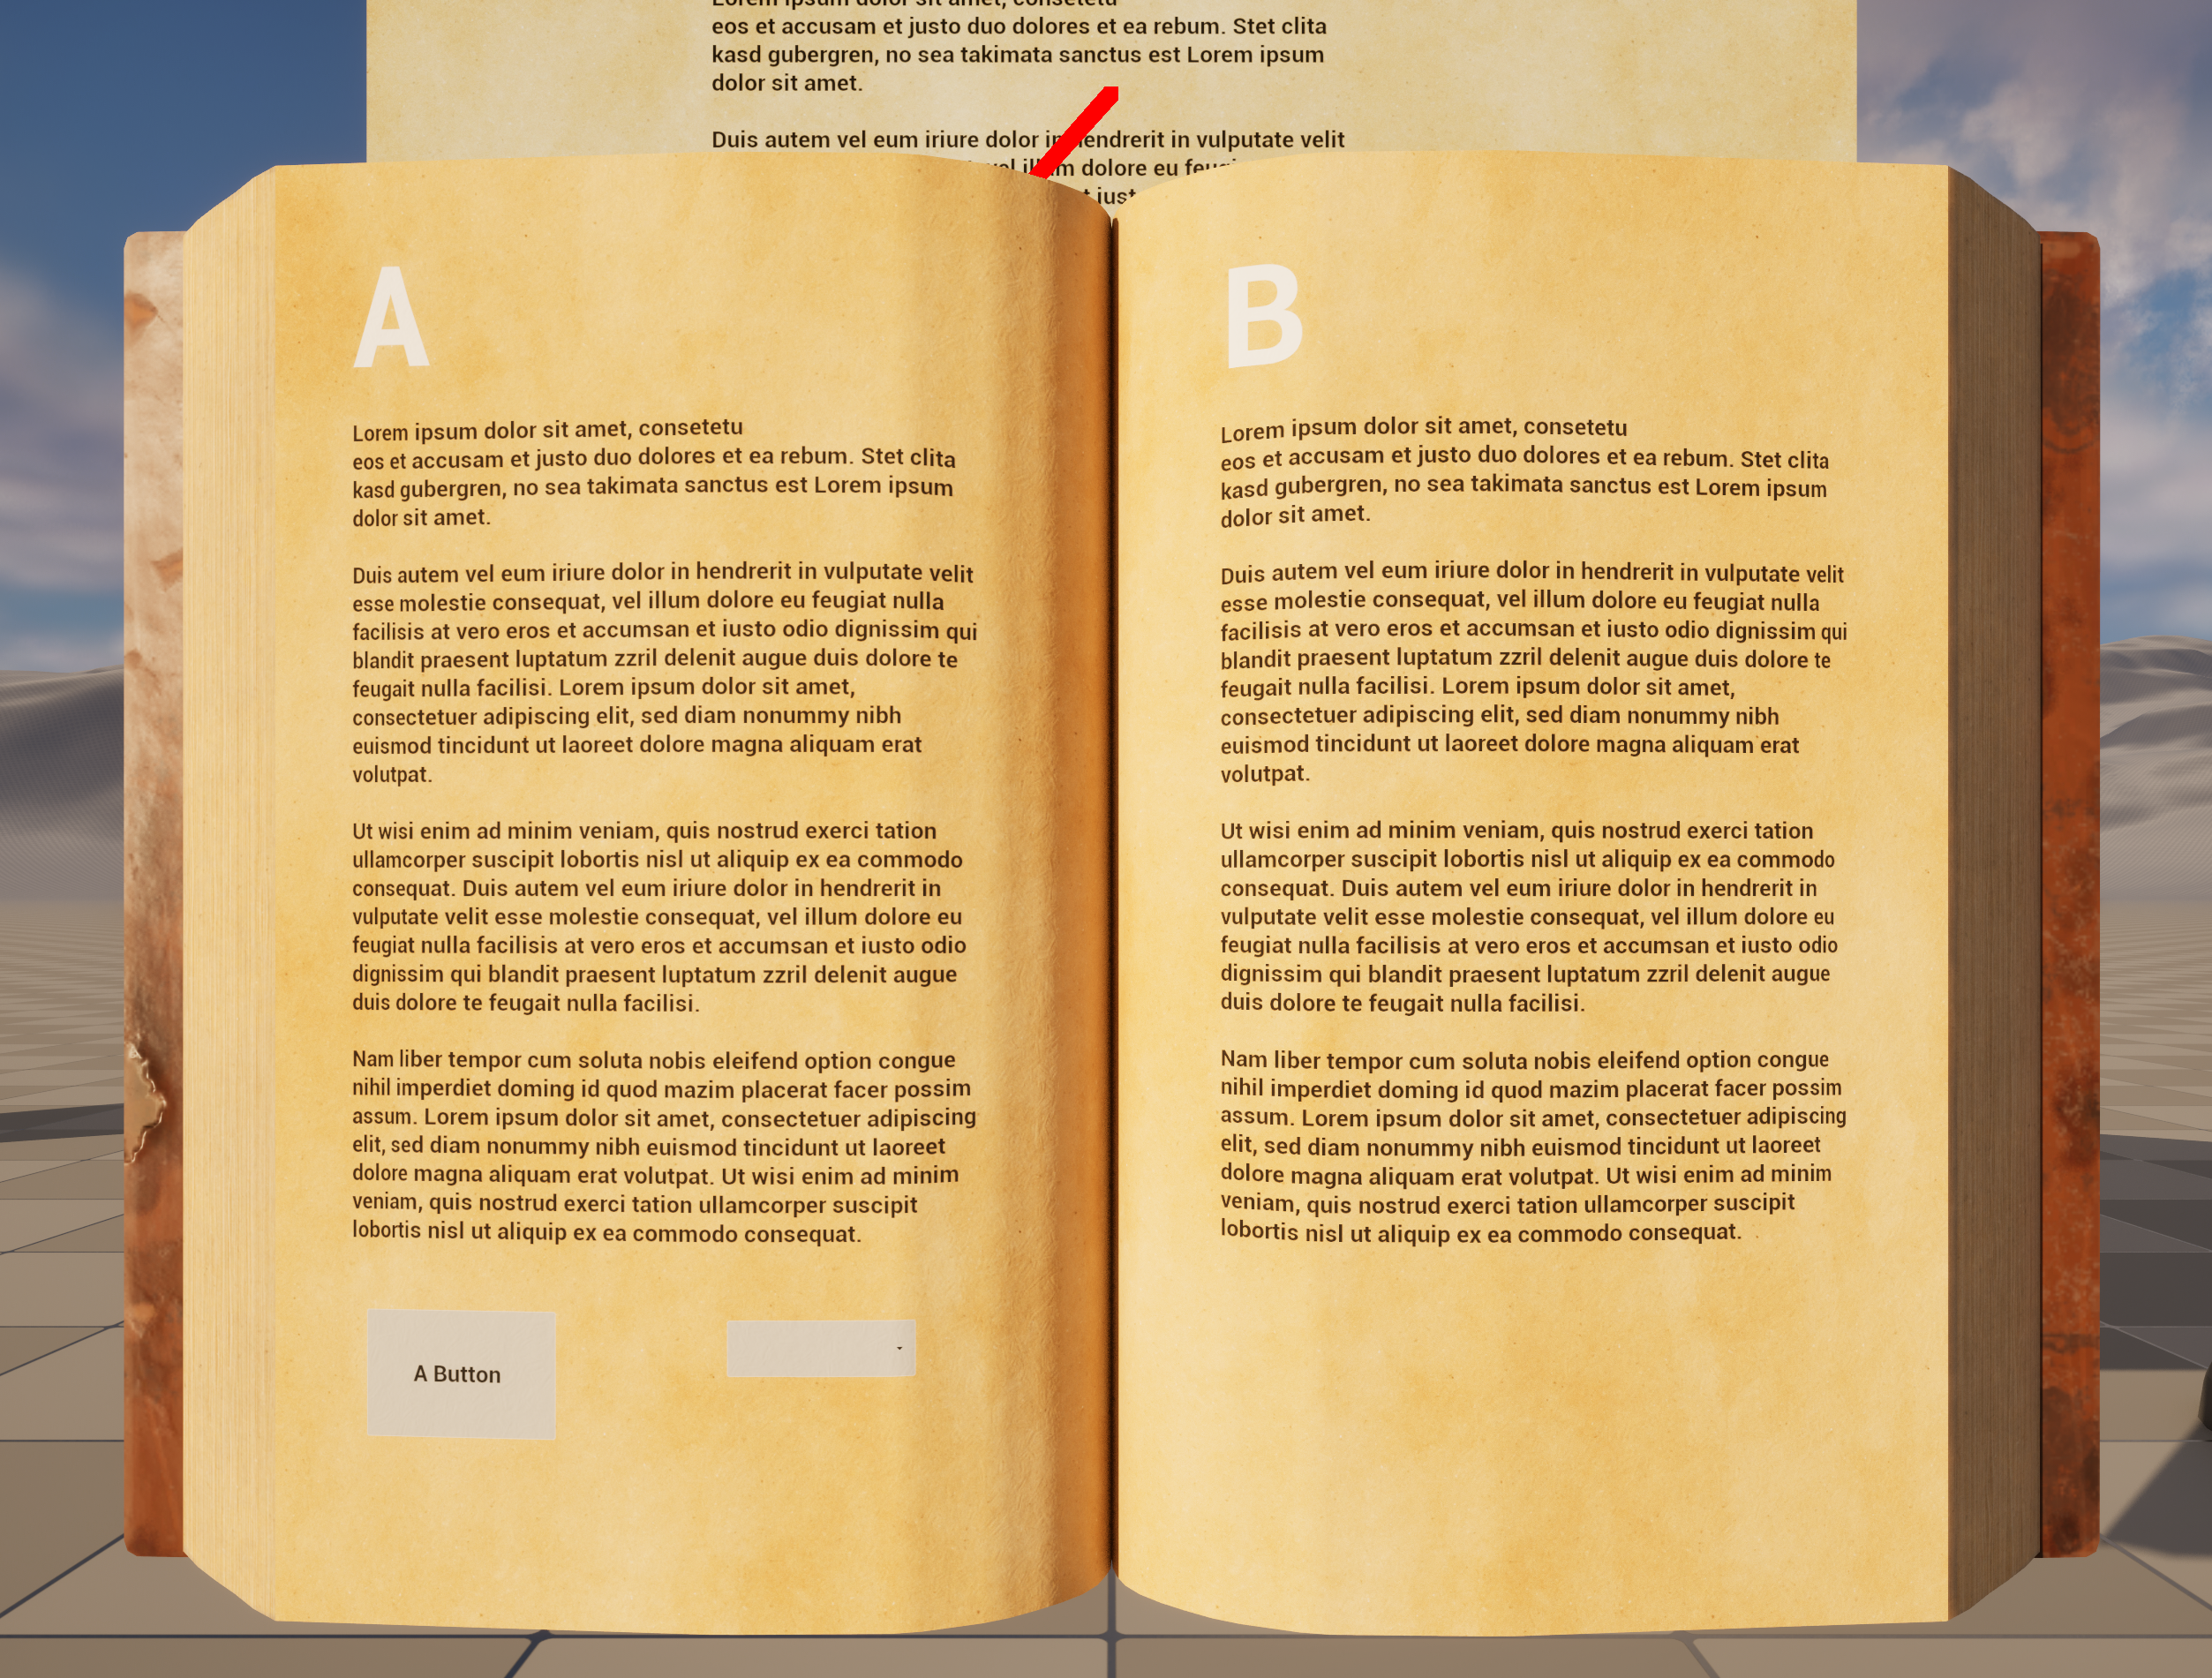
Hit play, you should see something like this:
Just the Book lying open without any page turn or interaction.\
That's what we will add next.
## Automatic page turn logic
__Adjust the Book Menu Data Config__
Open the ``MyBookData asset`` (the one we copied earlier from the plugins content folder)\
Uncheck ``Book Begins Play Open`` and set the ``Start Page Section`` to 0\
As we remember from the previous play test, the book started in an open state. That was because those options were set.\
Save the asset and run the game again by hitting Play.\
You should now see that the book starts in an closed state and simply does nothing else.
__Adjustments of the Book Menu Actor__
Open the ``MyBookMenuActor_BP`` Blueprint (the one we copied earlier from the plugins content folder)
``OnBeginPlay`` we want open the Book and set some timers to automatically turn the pages after 5 and back again after 10 seconds.
> **_NOTE:_** Because Begin Play is also exactly the moment where the whole initialization of the book, the rendering and the Anim instance happens, we should not call any book controls on begin play. But there is a solution by adding a one frame delay
Add the following Blueprint Nodes to Begin Play of MyBookMenuActor_BP
The Delay Until Next Tick must be called before any book control functions on Begin Play. Otherwise the initialization and the control calls collide with each other.\
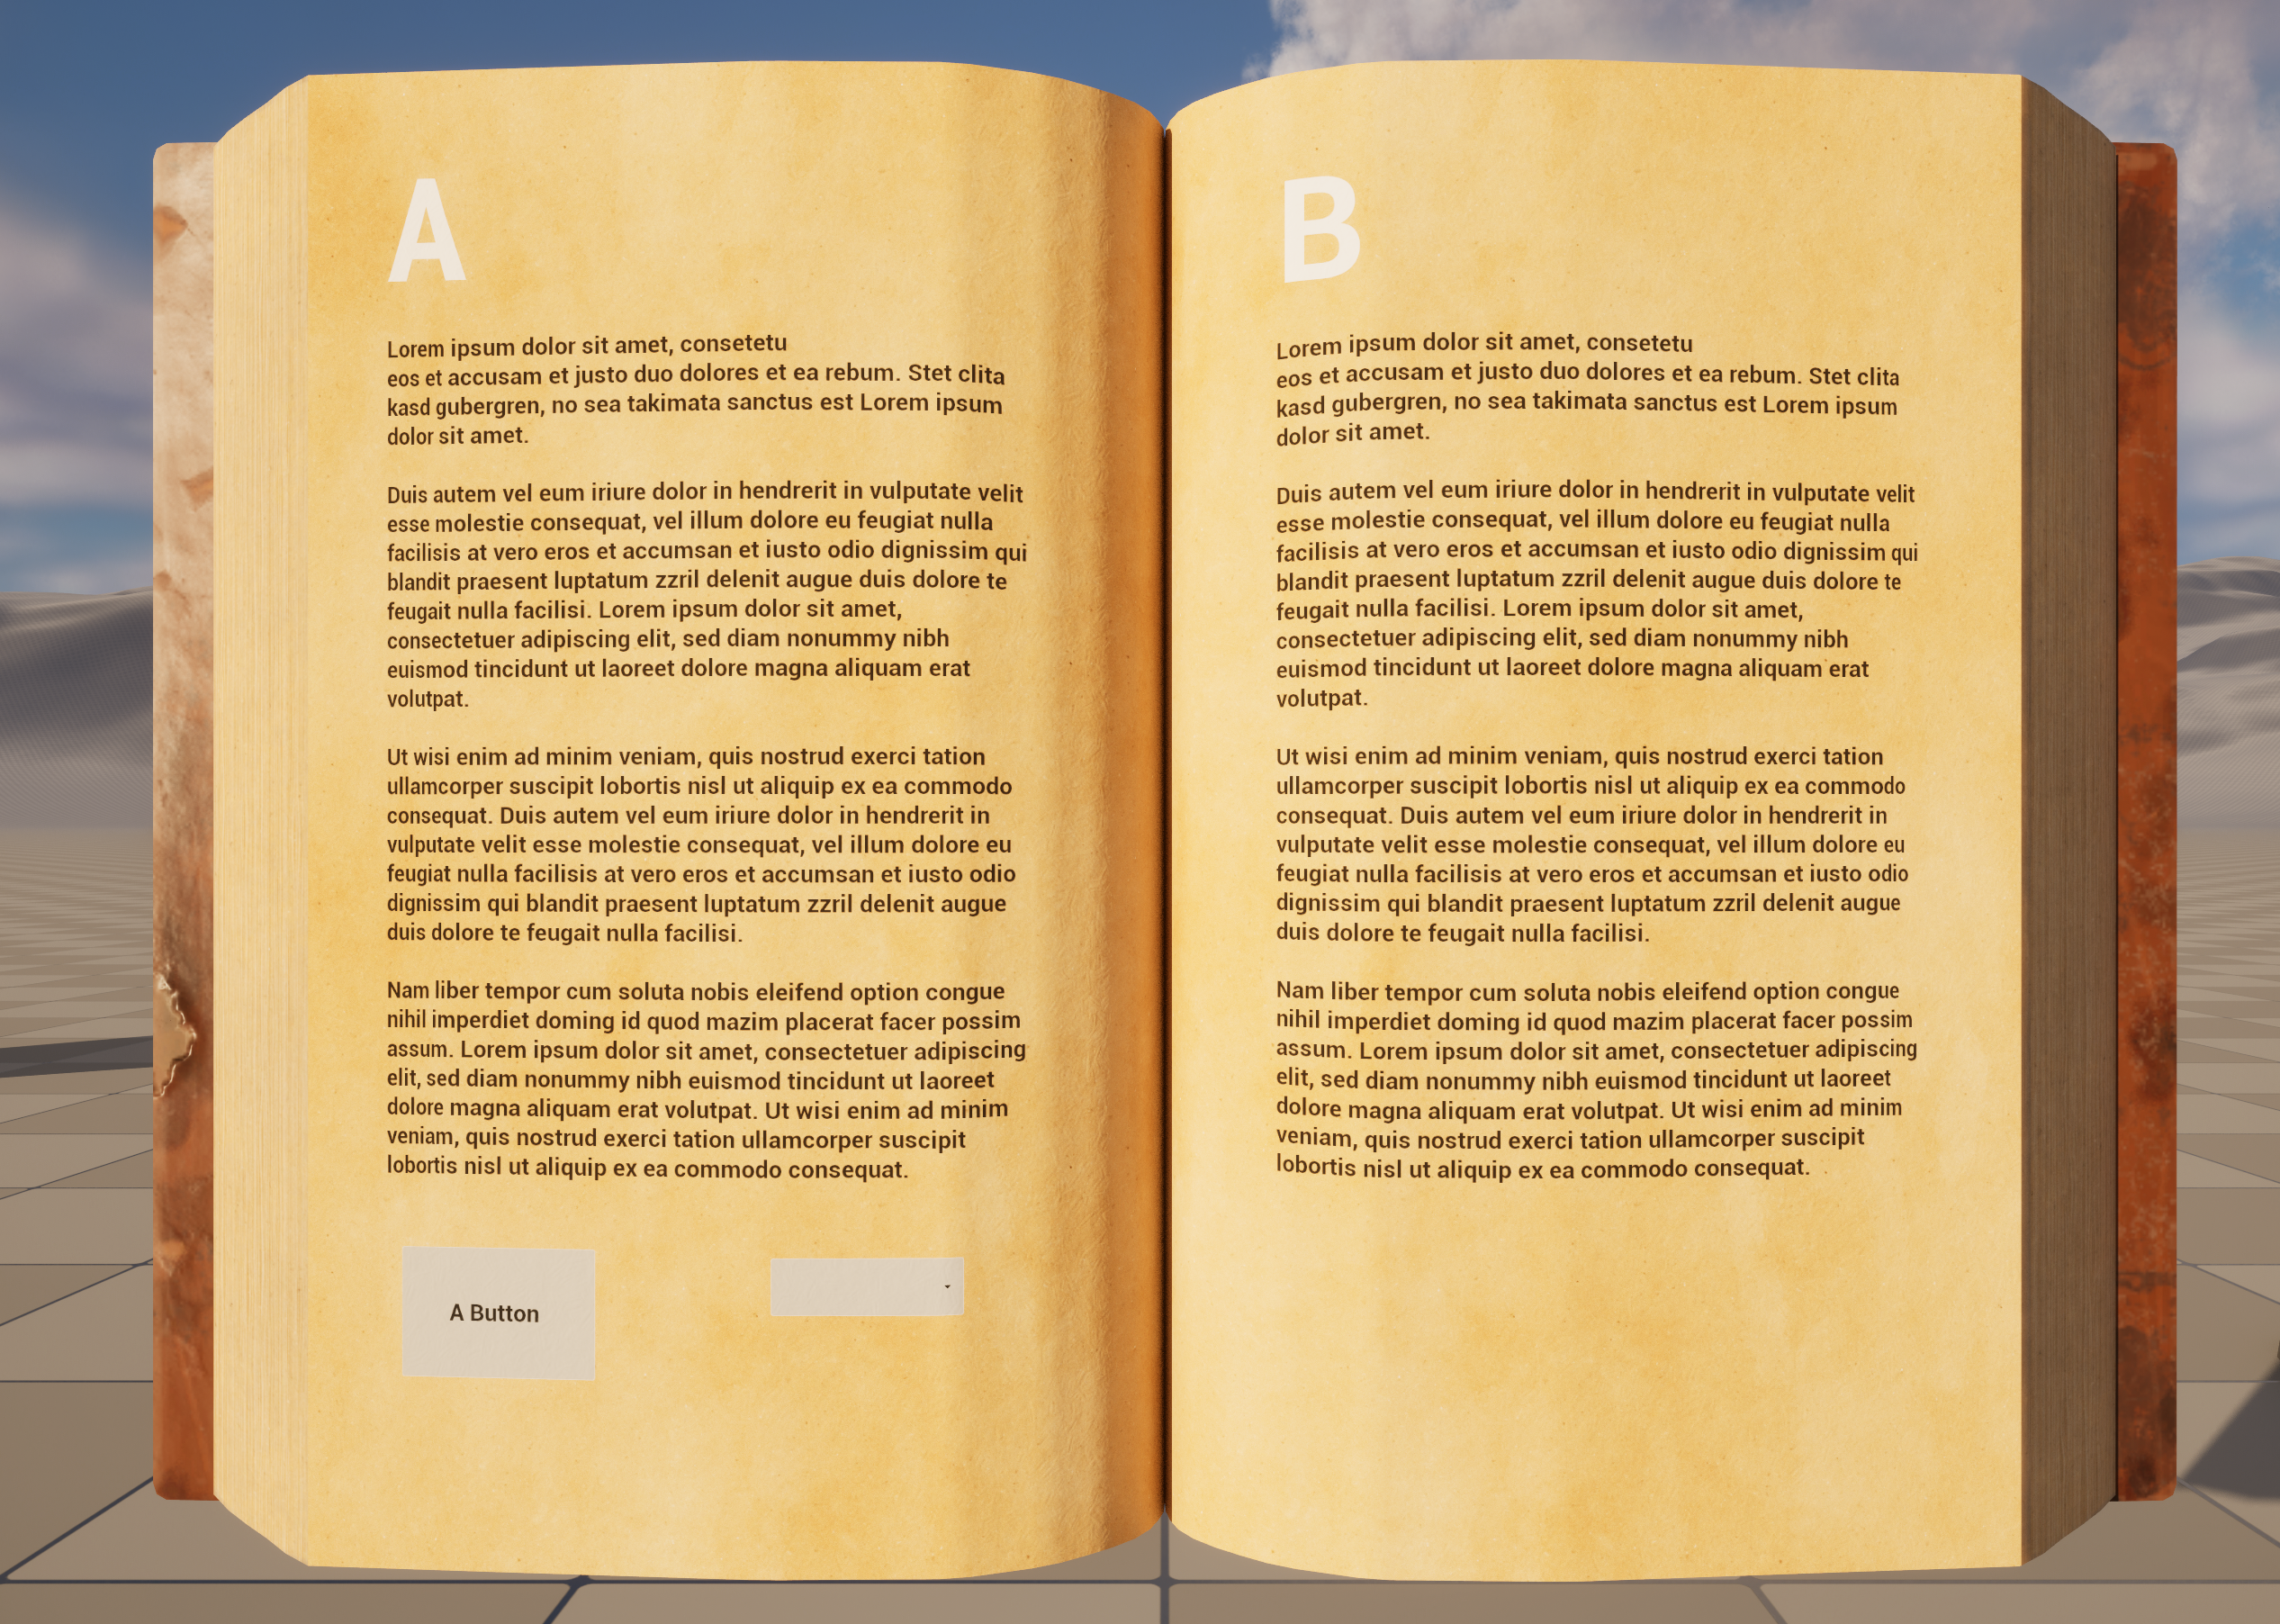
If you hit Play you should see an opening book animation ending like this:
Now let's add some automatic page turning. Add the following Blueprint Nodes to the output of "Open Book At"
This will open the book. After 5 seconds the book will perform a forward page turn because the new Page Section we are jumping to is greater than the current one.\
After 10 seconds the book will perform a reverse Page Turn because the Page Section we are jumping to is smaller than the current one.\
Hit play to see the animation sequence we just created.
## Adding book interactions
Last but not least, let's make the pages interactive. We want to create an interactive mouse which enables us to hover over the buttons and also to click on the buttons of the pages.
__Add Book Menu Interaction Component to the Player Pawn__
Open the ``PlayerPawn_BP`` Blueprint.\
Add a ``BookMenuInteractionCopmponent`` to the ``DefaultSceneRoot`` of the Actor
Select the ``BookMenuInteraction`` Component and set the ``BookMenuInteractionActor_BP`` as the value under\
``BookMenu > BookMenuInteractionActorClass``
__Extend Begin Play on the Player Pawn__
On the Begin Play Node add the "Register Interaction Component" Node after Set Show Mouse Cursor:
This registers the newly added BookMenuInteraction Component inside the Book Menu Actor
__Create regular mouse traces__
In order to interact with the pages of the book we want to create traces starting starting from the mouse cursor on the screen into the game world.\
For this purpose the Book Menu Statics Library offers a node called ``Create Mouse Trace Parameters``.\
Those parameters can be used to try an interaction on the Book Menu Actor.\
Add the following nodes to the Event Tick of the PlayerPawn_BP:
This creates the mouse trace parameters with an trace distance of 500 units and passes the start and end locations for the actual trace into the interact method of the Book Menu Actor\
If you enable ``Debug Trace`` you will later see how the traces are performed by drawn lines inside the viewport.\
Apropos viewport, let's switch to the viewport of the book menu actor and position the book menu interaction component in a way so that we can see what it is actually doing.\
In the viewport move the BookMenuInteraction Component to the position ``X:120`` ``Y:0`` and ``Z:60``\
This will place the ``BookMenuInteraction`` Component so that we can see it in game.\
Like this in the background:
> **_NOTE:_** Usually you don't want to have the Book Menu Interaction Component on screen. Therefore it makes sense to move it behind the camera and for multiplyaer games not to replicate the component at all.
Lets move the Book Menu Interaction Component behind the Camera to position ``X: -120`` ``Y:0`` ``Z:0``\
Hit play and hover the Buttons. You should see them lighting up. But you can't click them yet. Thats what we are doing next.
__Adding Input to the Book Menu Interaction Actor__
Somewhere inside the event graph of PlayerPawn_BP add the following nodes:
This gets the Widget Interaction Component from the Book Menu Interaction Component. We can use this Widget Interaction Component like any normal Widget Interaction Component (see: Unreal Engine Documentation ) Which means we can do a lot of stuff with it. In our example we implement a pointer key press and release.\
Hit play and you will be able to hoer and click the buttons.\
That's the getting started Have fun and have a look onto my [Youtube Channel](https://www.youtube.com/@suricoon) for more tutorial, which will be added from time to time!